Showing posts with label 3 - D items. Show all posts

Monday, August 25, 2014

everything goes!

Hello friends!
The Inspiration Journal challenge this month is 'everything goes' you're free to do whatever you like!

I recently got the Retro Halloween Framelits set and the block die. Yeah, I'm way late to the game with these, but, there is SO much I NEED and it takes time to acquire everything! 
I had fun with this after I got in the swing of making it, I quite like the skeleton witch holding the skull garland, looks like she's holding skull paper dolls! haha


 I've had the rosette on my desk in the catchall dish forever, I finally had the chance to use it!
I love using Enamel Accents for dimensional eyeballs! 
You just squeeze a drop of white onto the eye and then squeeze a drop of black on top of the white, it just forms perfectly. I usually let it dry overnight before I handle it
~~~~~~~~~~~~~~~~
Supplies: stamps - retro halloween framelits. paper - black and white cardstock, lost and found paper stack. ink - archival jet black, terra cotta and pitch black alcohol inks, blending solution. distress ink in vintage photo. acces. - black and white enamel accents, wooden skewer, foil tape sheets, elements tissue tape, martha stewart carnelian glitter, cereal box cardboard. tools - retro halloween framelits, vintage lace, bats and crossbones garland, mini rosette and block dies, hot glue gun, foam squares
~~~~~~~~~~~~~~~~
It's your turn to upload your project over at the Inspiration Journal for your chance to win $50 in store goods from Inspiration Emporium. When you're shopping make sure and use my discount code ieirisgarden for 10% off your purchase!

It just so happens Linda Ledbetter at Studio L3 the social media coordinator for Inspiration Emporium is hosting the CC3Challenge #9, (Compendium of Curiosities 3) and the challenge is to use any Tim Holtz Framelits set. There are prizes galore to be had, so make sure and enter your Framelits project over there for your chance to win!
~~~~~~~~~~~~~~~
Have a great day!
From Millan.Net


Wednesday, July 16, 2014

faith is the bird

 Hello friends!
The Inspiration Journal challenge this month is summer fun, create a summer themed project.
I decided to make a bird themed journal page, bird watching is summer fun, right?

 I got the quote from Pinterest, as usual.
I can't believe I had the nerve to stamp it directly on the page! I did real well until I got to the a, and, it's kinda upside down lol. It could have been worse, believe me!

 I got one of Tim Holtzs worn covers, I wanted to make a small journal out of it and make single pages to add to it. 
 It was kinda unnerving punching hole in my page!
 When I closed it this happened.
I think I need to get the bigger worn cover journal and use this one for tags.

Supplies: stamps - artful flight, su! rough edges alpha, date stamp. paper - white cardstock, scrap pattern paper. ink - archival jet black, coffee and forget-me-not, versamark. acces. - white and gold embossing powder, white embossing paste, distress stain in tumbled glass, gold eyelet, composition worn covers, ring binder, label letters glossy accents. tools - doily and bubble stencils, corner punch, handheld circle punch, sizzix borders die, tracing wheel, crop-a-dile, heat tool.
~~~~~~~~~~~~~~~~
Here's a project I did not long ago.
Finding the plates and cups at flea markets is half the fun!
 Wouldn't these make perfect gifts filled with cookies or cupcakes?
~~~~~~~~~~~~~~~~~~~~~~~~~~~~~~~~~
Get started on your challenge project, you have until the end of July to upload it at Inspiration Journal.
You can find the goods at Inspiration Emporium, use my discount code ieirisgarden for a discount on your purchase!
~~~~~~~~~~~~~~~~~~~~~~~~~
Have a great day!
From Millan.Net

Tuesday, May 20, 2014

celebrate paperweight

Hello!
This months challenge at the Inspiration Journal is "celebrate".
So I've made a little gift for the father in my life, my Mr., Terry :)

My fave thing to do when I'm junkin' is to search for vintage items and bring them back to life, just like this paperweight. Whenever I see them cheap I'll pick them up so I have a few on hand.
I take the pictures out of them and get creating!
You can find vintage ones that are deep enough to add thick trinkets and such.
Like this one, I used Tim Holtz idea-ology findings.
This was really hard to photograph with the light reflecting off it, I'll do my best to tell whats inside.
I used a scrap from the Eclectic Elements Melange 8 piece fat quarter for the base, the one that looks like measuring tapes, I like the look of the fabric magnified, you can see the weave of the fabric.
 I took an old chipboard coaster from Chili's and traced the paper weight on it.

           I got this Peel n Stick fabric fuse at Walmart, you stick the fabric on it and cut it like cardstock, 
                                           no ironing needed for this, perfect for small projects!
I traced the chipboard circle onto the fabric and cut that out and then I had my base to glue my trinkets to.
I used a key, the keyhole has a tiny piece of scrap cardstock from the 8x8 collage paper stash glued to the back and then I filled it with Glossy Accents, there's a game spinner, a long fastener, a tiny flat washer, 2 mirrored stars and xoxo from Chitchat Verbages. 
After everything was glued down I glued the paperweight to the base with E6000.
Here's a picture of the supplies I used. 
Now, it's your turn to make a celebration project and upload it to the Inspiration Journal for a chance to win $50 in supplies from Inspiration Emporium!
Be sure and use my discount code ieirisgarden for 10% off your order!
Have fun!
~~~~~~~~~~~~~~~~~~~~~~~~~~~~~
From Millan.Net

Friday, March 28, 2014

someone special

Hello!
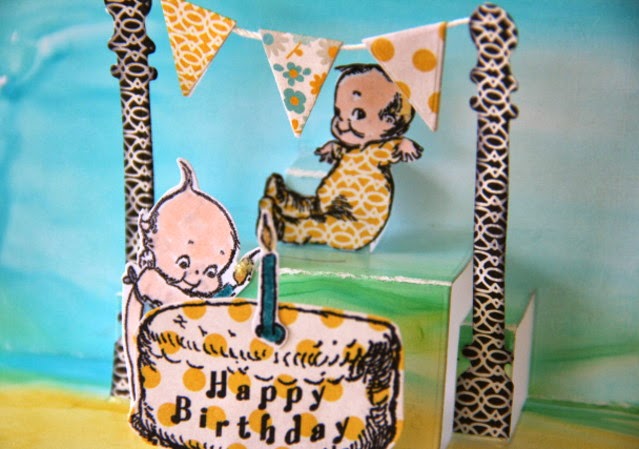
Today I have a card using the die set Lots of Pops from Elizabeth craft designs by Karen Burniston.
This is my first card using these dies and I must say, they are so much fun!
You can build the cutest scenes with this die set.
I used the paper pad Park Bench by Fancy Pants, it matched the ink colors perfectly!
The paper ric rac was cut with the MFT jumbo ric rac die and the scallop on the edges with the open scallop die.
I used a star on the sentiment tag.
 I had this piece that I made using Wendy Vecchi's Archival reinker technique.
I thought it would make a cute background. 
The stamping was done with the Crafty Secrets Kewpie's stamp set.
I went to the website and it looks like the set is sold out, but, there are more Kewpie sets for sale.
 The reinker colors are Archival dandelion, forget me not and the stamping was done with jet black.
I used Distress Markers and Copic markers for the coloring on the Kewpie's.

Thats it!
I hope you can upload your colorful creation to The Journal for a chance to win some spending money at Inspiration Emporium. Remember, you can use my discount code ieirisgarden for 10% off your oder!
~~~~~~~~~~~~~~~~~~~~~~~~~~
Have a great day!
From Millan.Net

Monday, February 24, 2014

tattered floral key ring

Hello, hello!
I have a key ring to show you tonight.
When I saw the new cable binder rings Tim Holtz came out with I was SO excited, I used to have a key ring just like it. It's perfect for holding odd size keys like my car key on this one and the keys are super easy to attach to the ring, I really like that!
Binder rings are not just for binding!
I used my new Jumbo Tattered Florals die and cut 2 flowers and 2 leaves out of shrink plastic. I colored them with alcohol inks in cranberry, denim and bottle using an applicator felt. 
I added some design on the leaves with a Prima Finnabair texture stamp and Archival jet black ink and on the denim flower I used a pencil eraser for the dots and jet black ink. 
I punched a hole in a flower petal with a 1/2" circle punch. I wanted a bigger hole so the flower could move freely.
Next, I shrunk the flowers and leaves with my heat tool and glued them together with E6000 glue and added the mirrored star.
There we have it, super easy to make and with all of the large dies and stamps out there, and now binder rings, cute key rings can be made!
~~~~~~~~~~~~~~~~~~~~~~~~~
Have you uploaded your project for the February challenge at The Journal? You have until the end of the month, it's all about quotes and words. 
Don't forget to use my discount code ieirisgarden for 10% off your order at Inspiration Emporium.
~~~~~~~~~~~~~~~~~~~~~~~~~~~
Have a good night!
From Millan.Net

Sunday, February 16, 2014

live simply

Hello friends!
The sun is shining so pretty today, sure does uplift the spirits!
Spring may be around the corner, I hope so!

I got my new Jumbo Tattered Florals die and I LOVE those huge flowers! Just think of all the pretty things you can make with this die! I have to get my hands on some of  Tim's Ecletic Elements fabric, I know flowers made from that fabric would be gorgeous!

To start, I covered a deep 6x12 canvas with old sewing pattern tissue and Melange tissue wrap. 
I painted on some gesso to tone it down a bit, lightly, not covering the whole thing. 
First I used my archival cornflower blue and french ultra marine inks and the stripes, burlap and bubbles stencils for the 'sky' at the top. Next, I used my rays stencil for the 'sun' with some metalic gold embossing paste. Oh my, that stuff is gorgeous! I toned it down with gesso, it was too bright for what I was going for, but, wow, I love it! For the green 'grass' at the bottom I used the honeycomb stencil with archival fern green ink. Then I added some texture with a Prima Finnabair stitching stamp and jet black ink.

 I cut the flowers out of book paper, a large paper doilie, burlap that I painted with gesso and a foil sheet. I adhered a book paper flower on the foil flower so it would be bendable. I painted everything with gesso, even the mirrored stars in the center. I used a pipe cleaner for the stem, I painted it with gesso and some bundled sage Distress paint. I spray painted the burlap leaves with some bundled sage paint and water in a mini mister, tah-dah, spray paint! 
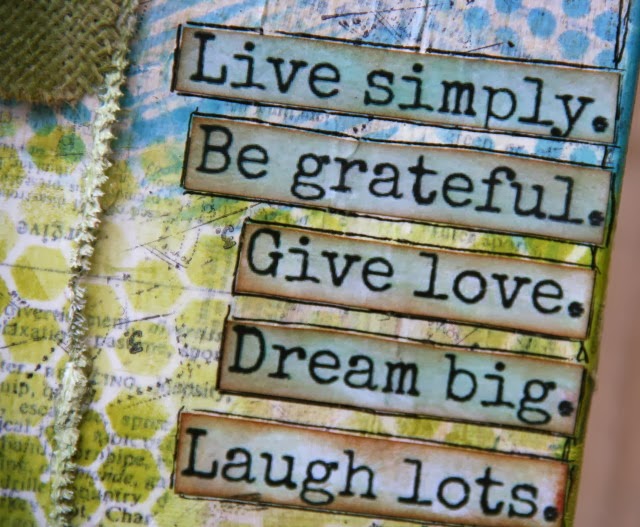
 I printed the quote from Pinterest. I loved it.
This months challenge theme at The Inspiration Journal is quotes/words.
Anything with a sentiment, quote or a word or 2 on your project, so easy!
You still have time to upload your project for a chance to win $50 to spend in Inspiration Emporium, shopping always makes me happy especially when it's free, right?
Remember, you can use my code ieirisgarden for 10% off your order!
~~~~~~~~~~~~~~~~~~~~~~~~~~
Have a great day!
From Millan.Net

Monday, February 03, 2014

time for love

Hello friends!
I finally altered my Tim Assemblage Clock
It took me forever to get this to come together. 
I just was not happy with every idea I had until this one and I really love it!
Since February is the month of love that's the theme I went with.
 To start I took the glass out of the clock so I wouldn't mess it up when I painted it.
It was easy to take out, I slid the 2 little metal bracket thingys on the bottom over with my fingers to release the glass and I slid it out. Then I painted it with 2 coats of gesso. I sprayed a matt sealer on it, thinking it might keep the gesso from chipping off. You may not have to do that though.
I cut paper from the Fancy Pants Park Bench 6x6 pad and I cut the heart from Primas Anna Marie 6x6 pad and adheared it to the back of the clock. This piece comes right off the back of the clock to get inside.
I cut the cupid and heart from chipboard and covered them with glitter. I printed a picture of me and Terry in black & white and cut it and adhered it to the heart, but, it was so dark and it wasn't working for me, so I painted gesso over it and sprinkled on the glitter. Glitter makes everything better! I colored the white Kaiser Pearls with a Copic marker r27 to match the red heart.
I cut a burlap flower with the Tattered Florals die. I had some lace flowers in my stash that I made, you can see the tutorial here. I put the glass back in and glued all the flowers and cupid inside with a hot glue gun.
I colored some crinkle ribbon with some watered down Distress Stain in Fired Brick made a bow, hot glued it to the outside and put some heart trinket pins through it.

What are you making for the love month?    
You can get all of your love supplies at Inspiration Emporium and you can get 10% off your order using my coupon code ieirisgarden!
~~~~~~~~~~~~~~~~~~~~~~~~
Have a great day!
From Millan.Net


Monday, December 16, 2013

Christmas garlands

I finished my garlands!
I've been enjoying the garlands I've been seeing on Pinterest and Instagram especially Christie Tomlinson's, she's the garland making queen! If you're on Instagram you really need to check her out!
I have a big pink McCoy planter on my desk that I use for a catch-all. Most of the stuff I used were extras I  already cut with dies or purchased and put in my planter.
It's always satisfying using up this and that in your work.
For this one I used burlap flags, a Tim Holtz tattered flower and pinecone greenery dies and a flower made from a tea stained coffee filter that I got at a flea market.
The flower and pinecones below are cut from the Tim Holtz Kraft Resist paper stash.
I made this one with the Tim Holtz snowflake rosette die and white cardstock, some glitter and buttons.
On this one I used Tim Holtz journaling tickets as the base - they're on sale right now :) pinecone and mini rosette dies, paper scraps, gesso, peeled paint Distress Stickles, Martha Stewart glitter and book paper punched with a scalloped circle punch and distressed with some Distress Gathered Twigs ink. and some mini pom-pom trim stapled on with my tiny attacher.
 I don't have a fireplace mantel, but, I do have a book shelf and I think it works! 
~~~~~~~~~~~~~~~~~~~~
You can get most of the materials I used at Inspiration Emporium. 
Use my discount code ieirisgarden for 10% off your order!
~~~~~~~~~~~~~~~~~~
I was so excited to see I made Tim Holtz's blog worthy link list again!
I'm in awe to be among the talented ladies he picked, it really makes me happy :)

Have a great day!
From Millan.Net

Monday, December 09, 2013

Christmas ornament

I got the idea to use Tim's 8x8 Seasonal Paper Stash and Fragments to cover this cardboard ornament I got from Hobby Lobby.
First I painted the ornament with gesso
I glued the Fragments on the paper with Glossy Accents, cut around the Fragments and glued them on the ornament.
Next, I painted on the Glossy Accents with a paint brush between the Fragments and sprinkled silver glitter on.
I used my Tattered Pinecone die for the pinecones and greenery. I cut them out with paper from the Kraft Resist Paper Stash. I lightly sprayed them with Dylusions melted chocolate ink spray. 
I used some of my vintage lace and tatting along with the pinecones and greenery to decorate the top. I adhered everything on top with my glue gun.

I took some close up pic's of each side outside in the natural light.


~~~~~~~~~~~~~~~~~~~~~~~
Be sure and check out Inspiration Emporium and check out Tim Holtz's new Sizzix dies you can pre-order, they look amazing!
Remember to use my discount code ieirisgarden at check out for 10% off!
~~~~~~~~~~~~~~~~~~~~
We've been iced in around here since last Thursday. 
Hopefully, we can thaw out today!
I have places to go and things to do, lol!
Have a great day!
From Millan.Net


Saturday, November 02, 2013

bouquet canvas

Hi bloggers!
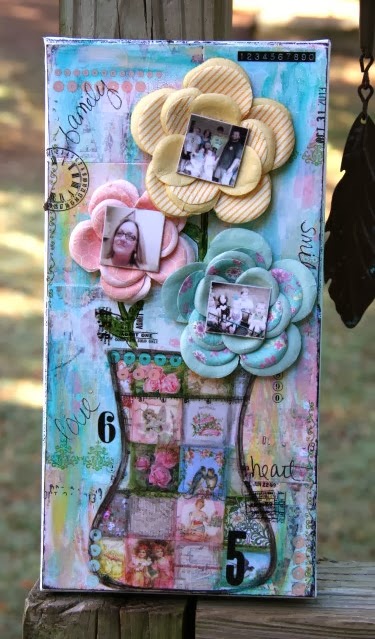
I decided to do a canvas. 
I've been loving the canvases Christy Tomlinson does so the inspiration for this one came from her!
I covered the canvas with paper from the Prima Divine 6x6 pad. I went over that with Adirondack snow cap paint dabber and Claudine Helmuth classic teal, traditional tan, painterely pink and yellow pastel paints, I applied those here and there with my finger.
This is the first time I've used her paints and I have to say, I love them! They are so creamy and nice to work with. I got the urban mini paint set from Inspiration Emporium, I need them all!
I drew the vase on the back of a piece of the Divine paper, cut it out and adhered it to the canvas.  I painted over it with matte multi medium to make a non porous surface so when I did my shading I could move the ink from the pens with my finger. I did the shading with Faber-Castell big brush pens in cold grey 233, medium flesh 131, cadmium yellow 107, chromium green opaque174 and black199.
I used a bunch of rub ons from imaginise dream come true, which IE has on sale for $1 right now!! tim holtz remnant rubs numbers and Heidi Swapp.
I used Prima Divine flowers. I pinched the centers out of each one so my pic's would lay flush on the flower.
I cut the pics in squares to match the little squares in the vase.
I wrote some words on the canvas with Sakura Micron 08 black pen. 

I hope you enjoy the canvas and are inspired to make one of your own!
~~~~~~~~~~~~~~~~~~~~~~
I saw this on Pinterest and loved it. 
I had been wanting to do something like this with my cigar boxes for awhile and this pushed me on to do it!
I have a huge collection of cigar boxes, mostly wooden ones of all different sizes. I made holes in them with my awl with is basically a short handled ice pick. I used some metal name plate thingy's and brads to attach them to the boxes. I stamped the words on some cardstock to put behind the plates, so I can change them if I need to. I glued down some of the torn paper on them with matte multi medium.
My Claudine Hellmuth mini paint bottles are in the top one :)
~~~~~~~~~~~~~~~~~~~~~~~~
Have a great weekend, thanks for looking!
From Millan.Net
Related Posts Plugin for WordPress, Blogger...