Friday, October 11, 2013

she designed a life she loved

 Hey bloggers!
I did my first page in my new art journal and I love this journal!
The only thing is I've never used an inclusion  like this in anything. There are envy's, file folders and tags between the pages that need to be altered. It will be a challenge for me to use those unless I use them for the sentiments only, hmmmm. I'll have to ponder that.
 I got my new Prima doll stamp and I wanted to use her right away. I love her, she's not a little girl or a beauty queen, she's a pretty lady :) I paper pieced her dress and headband with paper from the Prima 6x6 Nature's Garden paper stack. The hearts and scallops on the bottom are from the stack. The background is torn pieces from the paper stack too.
I used some of my vintage lace and that flower, I don't know what it was used for, it looks like it's been crocheted or tatted on.

I've been pinning quotes on Pinterest to use in my journaling.
There are the eyelets I'm using up. I remembered them at the last minute :)
I've been having fun using remnant rubs and rub-ons. I love the little words in Tim's words rubs, they were perfect for the hearts.
I distressed some Prima wood flower embellishments with distress paint and stamping. I had some punched scalloped circles from sewing pattern tissue on my desk, I backed the flowers with that and punched small circles from the paper for the center of the flowers.

Supplies: stamps - prima mixed media doll stamp, sunrise sunset set, tim holtz tall text set. paper - prima tag pad (I stamped the doll on a tag and cut her out), prima 6x6 natures garden paper stack. ink -microm 08 black pen, archival jet black ink pad, copic markers 100 and e57, faber-castell black big brush pen. acces. - matte multi medium, embossing paste distress paint in spun sugar, broken china, bundled sage, gathered twigs. prima wood flower embellishments, eyelets, tim remnant rubs words, kaiser rub-ons, vintage lace. tools - mini silhouettes die set, prima stencil, mft jumbo scallop die, circle punch, heart punch,  glue gun.
~~~~~~~~~~~~~~~~~~~~~~~~~~
Have you uploaded your "faux" project over at The Journal yet? You could win $50 in supplies from Inspiration Emporium if you're the winner. You really need to give it a go, it's always fun to shop for free, right? You can always use my 10% discount using the code ieirisgarden at check out.
~~~~~~~~~~~~~~~~~~~~~~~~~~
Oh, Oh, Oh! I made Tim's blogworthy links list today, From Millan.Net totally M.A.D.E. M.Y. D.A.Y.!!

Have a great weekend!
From Millan.Net

Friday, October 04, 2013

hands full of treats tagged

Happy Friday bloggers!
I've got more Halloween tags to share along with some creepy "handy" treat bags.
I pinned this super cute idea I found on Pinterest using disposable vinyl gloves.
I filled them with Halloween pencils, candy, bracelets, earrings and even a Razorback coin holder!
I made these for a few of my fave goblin's :)  
 I'll give you some links at the bottom of this post for the supplies I used. If you have any questions about anything I've done just shoot me an email!

 I was inspired by Donna Downey to use up certain things on your projects that you have hoarded. I decided I'm going to try and use eyelets on all of my projects in some way. I have SO MANY of them and I hate to throw them away. I couldn't sell them either because everyone has them I'm sure! So, I'm on a mission!

 supplies: stamps - Tim Holtz seasonal catalog and halloween blueprint. paper - #5 manila tags, Tim Holtz seasonal 8x8 paper stash, black and white cardstock. ink - dylusions black marble ink spray, distress weathered wood and rusty hinge ink pads, rusty hinge, peeled paint and barn door (for the blood drops, ewwww) reinkers, archival jet black, faber-castell black big brush pen. acces. - vinyl disposable gloves, Tim Holtz apothecary remnant rubs, tissue tape, black and orange eyelets, Tim Holtz label letters, crinkle ribbon, black twine. tools - crop-a-dile, Tim Holtz bats and crossbones garland die, water brush, blending tool, matt multi medium.
~~~~~~~~~~~~~~~~~~~~~
That's it, I hope you like today's project!
The Journal September challenge "faux" is being carried over through October! If you didn't get a chance to play along now you can! Upload your faux project, you could be a winner!! Free supplies are ALWAYS good :) You can always use my discount code ieirisgarden for 10% off your entire purchase at Inspiration Emporium!
~~~~~~~~~~~~~~~~~~~~~
Have a great weekend!
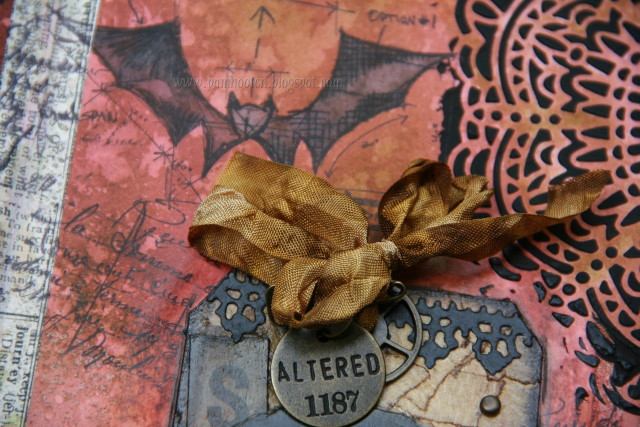
From Millan.Net


Saturday, September 28, 2013

sentimental journey

Good Morning bloggers!
This is my last creation for September.
Can you believe October is around the corner? Summer went by way too fast, I'm not ready for winter.
Anyway, I've got a tag to show you today using the new Tim Holtz Framed Silhouettes stamp and die set. 
 I covered a #8 manila tag with paper from the Prima Divine 6x6 paper pad. I stamped the frame with VersaMark ink and heat embossed it with gold embossing powder. Then I stamped the lady head with Archival jet black ink and die cut the frame and head with the dies in the set. I put her head on a piece of the Prima paper, adheared it to the frame and filled the center with Crackle Accents for a cracked glass look.
 Next came the bouquet of flowers. I colored the stamp with Distress Markers in worn lipstick, peeled paint and weathered wood. I used the old huffing trick to moisten the ink and stamped it. Then I cut that out with the die from the set and added the Kaiser pearls and rhinestones. I inked the stamp again and stamped it on the bottom left.
Next, I stamped the crinkle ribbon with Archival cornflower blue ink and cut it out with the die in the set. I went over it with some cornflower blue ink and my blending tool. The butterfly was laying on my desk so I added it to the tag. It's made using chipboard, the mini butterflies die set, picket fence crackle paint and glitter.
The sentiment is from Tim's chitchat verbages. I distressed the stickers with Distress Walnut Stain ink and a blending tool. I went around the edges with my tracing wheel. The crinkle ribbon is colored with bundled sage Distress Stain.
~~~~~~~~~~~~~~~~~~~~~~
That's it for September! Hope you like the tag!
Remember to upload your creation for the September challenge over at The Journal, it's not too late!
You can always use my discount code ieirisgarden at checkout for 10% off your purchase at Inspiration Emporium!
~~~~~~~~~~~~~~~~~~~
Have a great weekend!
From Millan.Net

Tuesday, September 17, 2013

night moves

 Hey bloggers!
Here I am with another spooky journal page.
When I started I wanted to do a night scene with a picket fence in the foreground. 
The skull is the eerie moon!
I've had this fence idea rolling around in my head for awhile as soon as I got the stamp. 

 I started by painting the page with gesso, drying that and spraying with water before I started spraying the Dylusions ink. I used black marble for the sky adding more water and dabbing with a paper towel until I got the look I wanted. 
For the ground I sprayed water and then the melted chocolate and cut grass, again, I used the paper towel moving it around until I liked the look. Next, I added Archival cornflower blue and watering can with my blending tool to give it a little color. I did the same at the bottom with coffee and olive ink.
I used the Prima 6x6 cracked stencil and Dylusions black marble ink here and there for some texture.
I stamped the fence along the bottom, the trees, birds and cat from Dylusions bits and bats stamp set with Archival jet black ink. I colored the fence with gesso, it blended with the ink on the page and toned it down so the white wasn't so bright, perfect! I stamped the skull from Tim's Apothecary set on book paper and colored the teeth with my Gelly Roll white pen. I used the 31 from the numbers Remnant Rubs on his forehead. I cut him out and adheared him to the page with matte multi medium and went around the edges with it so my black Faber-Castell big brush pen would stay wet enough for me to smear the ink with my finger. I colored the trees, birds, spider and cat with the pen so they would stand out more.
I put the words from the Apothecary remnant rubs in the fence posts, the fence says it all with the perfect Halloween words!
I finished it off with tissue tape all around the edges.
I hope you enjoy the page.
~~~~~~~~~~~~~~
Have you uploaded your entry in The Journals monthly challenge?
You really should, you could win $50 in Inspiration Emporium goodness!
Remember, you can always use my discount code ieirisgarden for 10% off your order!
~~~~~~~~~~~~~~~~~~
Have a great day!
From Millan.Net

Tuesday, September 10, 2013

creepy journaling

Hi bloggers!
Today I'm sharing my 2 latest tags, journaled. 
You can find the posts for each tag with supplies here at whispers and spooky.
I'm going to focus on the making journal pages with supplies today.
I have to say I had the most fun making these pages, I couldn't wait to get back to them.
They were so messy to make, but, that's part of the fun I think!
I had Dylusions ink and water sprayed everywhere and modeling paste and paint smeared everywhere. 
Total bliss!
To start I put tissue tape down the center of the pages so the ink wouldnt pool there. I sprayed the pages with water and then I sprayed Dylusions inks in melted chocolate, crushed grape, cut grass, black marble and more water here and there. I would dry with my heat gun between sprays and add more where I wanted it
Next I used my embossing paste that I colored with paint from my pitch black paint dabber and used the vintage lace mask by Christy Tomlinson for Pink Paislee and Prima sunrise, sunset stencil.
I did more distressing with Distress ink in peeled paint and rusty hinge with my blending tool.
Then I did some stamping with Archival jet black ink. I used Tim Holtz apothecary, halloween blueprint and classic's #6 stamp sets.
I did some water coloring on the bats, spiders, and skull eyes with my water brush filled with Dylusions black marble ink. The pipette makes filling the water brushes so easy, I couldn't do it with it.
I adhered the tags and went over them with gel medium, dryed and then inked around the tags with a black Faber-Castell big brush pen and smeared the ink with my finger. I add the gel medium so the ink from the pen will smear easier.
The splatters are just water sprinkled on the pages and dried with my heat tool.
~~~~~~~~~~~~~~~~~~~~~~~~
Ok, that's it, hope you like it!
Don't forget to check out The Journal and upload your September "faux"project for a chance to win some Inspiration Emporium goodies!
~~~~~~~~~~~~~~~~~~~~~~~~~~~~~~
Have a great day!
From Millan.Net

Thursday, September 05, 2013

spooky

Hey bloggers!
I have a challenge piece to show you today.
The Journal September challenge at Inspiration Emporium this month is 'faux'.
I headed over to Splitcoast Stampers to check out their tutorials and Beate Johns had a great faux leather tutorial. It's super easy, not many supplies needed at all and I love the look! I did a little faux stitching too.

I made another Halloween tag, I'll put both tags in my journal next, so stay tuned for that.
 I put little pieces of masking tape on a #8 tag and trimmed the edges.
 I put Distress Walnut Stain ink on lightly and on top of that I added Vintage Photo ink for more color.
 Next I poured on clear embossing powder, no need to put VersaMark ink on first, the EP sticks to the tape.
 I heat set the tag with my heat tool...
 and that was it! So easy. Next came decorating the tag.
 
I cut out the letters for 'spooky' and the pumpkin picture from Tim's seasonal 8x8 paper stash.
I used the Alterations Vintage Lace and Umbrella Man dies to cut the black cardstock.
I colored the Crinkle Ribbon with Distress Scattered Straw and Brushed Corduroy reinkers.
For the faux stitching I went around the edges of the picture with my tracing wheel and then I connected the dots with my Sakura Micron 03 black ink pen.
I adhered everything with multi medium in matte and put a coat over everything so I could do some distressing with the Archival Jet Black ink pad and my black Faber-Castell big brush pen.
I added a couple of  fasteners at the top along with a philosopy tag, trinket pin and sprocket tied with the ribbon.
~~~~~~~~~~~~~~~~~~~~
That's it, now it's your turn to do your faux project and upload to The Journal for a chance to win $50 in Inspiration Emporium goodies!
Remember you can always use my discount code ieirisgarden for 10% off your order!
~~~~~~~~~~~~~~
Have a great weekend!
From Millan.Net


Thursday, August 29, 2013

whispers

I'm back with my first Halloween project, I love Halloween, the candy, the costumes and little trick or treaters, ghost stories, decorating, haunted houses, and crafting!

I altered a tag using a #8 kraft tag. I put on the Distress ink in Dusty Concord and Rusty Hinge with a blending tool. Then I stamped a background with the Halloween stamps from the Mini Blueprint stamp set using Archival jet black ink. I outlined the spider web with black Enamel Accents and sprinkled on black glitter while it was wet. Next, I cut the lady head with the Mini Silhouettes die using black cardstock. I hand cut a witches hat, glued it to her head and covered her with black glitter. She's mounted on one of the houses from the Artfull Dwellings die that I cut from the 8x8 Collage Paper Stash. I cut some black lace from the Vintage Lace die and added it the house above and below the 2013 Remnant Rubs Numbers. I put 'imagination' from the Words Remnant Rubs along the bottom. I stamped the skull stamp on cream cardstock and colored it with picket fence, pumice stone and black soot Distress Markers and put black glitter on the eyes, cut it out and adhered it to the tag. I stamped the label stamp on a piece of the paper and put the word 'whispers' with the label letters. I stapled it to the tag with the tiny attacher. I used Rusty Hinge and Dusty Concord reinkers to color the crinkle ribbon to match the tag.  
See the little spider in the web? I covered him with black Kaiser pearls, cute! 
There we have it, hope you like it!
~~~~~~~~~~~~~~~~~~~~~~~~~~~~~~
Speaking of Halloween decor, I got my new creepy Scentsy warmer today...
You can't tell in this pic but, the web glows when it's turned on, I love it!
~~~~~~~~~~~~~~~~~~~~~~~~~~
You still have time to upload your project over at The Journal, yeah, you could win some Inspiration Emporium goodness!

Have a great day!
From Millan.Net


Thursday, August 22, 2013

fall atc

Hello bloggers!
I'm back again with another atc. I enjoyed the last one so much I wanted to do another for my atc album and Inspiration Emporium.
I wanted to use my Tim Holtz mini blueprint set. I stamped the oak leaf stamp with Archival Jet Black ink on a Tim Holtz journaling ticket, it fit perfectly, YAY, they are perfect for atc's and the mini blueprint stamps!
I stamped the oak leaf again on cream cardstock and colored it in with Distress Markers in dried marigold, rusty hinge, fired brick, tea dye and worn lipstick, I did some blending with the water brush. I cut the leaf out and embossed it with clear embossing powder on VersaMark ink and adheared it to the ticket.
I took the VersaMark pad and swiped it on the edges of the ticket and embossed it with black embossing powder for some distressing. I used my tracing wheel around the ticket for some faux stitching and put mini fasteners in the corners.
I cut a 2.5 x 3.5 piece of Tim's 8x8 collage paper and adhered it to the card base. Then I dry embossed it with the woodgrain texture fade. I put Archival coffee ink on the raised areas of the card. I added 2 more pieces of paper then I did some faux stitching on the sides. Finally, I adhered the ticket to the card.
That's it!
I hope you'll give atc's a go if you haven't already, I really like them, they're fun to collect!
~~~~~~~~~~~~~~~~~~~~~~~~~
Don't forget to upload your travel project to The Journal for a chance to win $50 in store supplies!
You can use my discount code IEIRISGARDEN for 10% off your order.
~~~~~~~~~~~~~~~~~~~~~~~~~~
Have a great day!
From Millan.Net


Thursday, August 15, 2013

artsy atc

Hey bloggers!
Today I have an artsy atc to show you.
I haven't made one in awhile, so I thought I'd make one to fill another spot in my atc book.
I used more Prima and Tim Holtz goodness, that's all I reach for these days!
You would think designing an atc would be easier than a card, not so! It's just the same as designing a full size card and you have to use little stuff so its proportioned right.
But, I love looking through my atc book at the little works of art.
I purchased this box of watercolor paper cards sometime ago, I pulled them out so I could use my Distress Markers with the watercolor technique. I had to cut 1/4" off the end to make the 2.5 x 3.5" card. You can get pre-cut blank atc's at Inspiration Emporium.
I scribbled on the card with Distress Markers dried marigold, rusty hinge and worn lipstick. I used my water brush to blend the colors into each other. I dried that with my heat tool and then I stamped the card using my Prima Floral and Script background stamp with Archival Jet Black ink. I inked the edges of the atc with my jet black ink pad.
 
I used paper from the Prima Divine 6x6 paper pad and die cut the mini butterfly and ticket, I cut the banner from  a piece of the paper. The butterflies body is from Tim Holtz Label Letters stickers.
The metal embellishments are Prima Mechanical RosesMechanical Flowers small and Junkyard Findings clock parts.
The black tape measure is Tim Holtz Elements tissue tape.
I outlined the banner and ticket with my Faber-Castell black big brush pen and smudged the ink while it was still wet.
I made the atc holder from a wine cork and memo pin.
~~~~~~~~~~~~~~~~~~~~~~~~
OK, that's it, I hope you enjoyed the atc.
Make sure you head over to the Journal and upload your creation for the August challenge.
Don't forget to use my coupon code IEIRISGARDEN for 10% off your order at Inspiration Emporium!
~~~~~~~~~~~~~~~~~~~~~~~~
Have a great day!
From Millan.Net


Wednesday, August 07, 2013

Inspiration Emporium travel

Today I have a journal page to show
you with a travel theme, that's the challenge at Inspiration Emporiums Journal this month.

The first thing I grabbed was the Tim Holtz Remnants Rubs Words and Elements. They've got the perfect words and travel related pictures.
I used papers from Tim Holtz's 8x8 collage paper stash, cut them in different sizes and glued them on randomly. Then I did the inking and stamping. I used Dylusions melted chocolate spray ink and Prima's Flourish stencil randomly on the page. I used the script stamp from the Prima Hello Pastel set and the lace, background and tack stamps from the Sunrise Sunset set, I used Archival jet black and vermillion ink.
The rectangle piece of paper behind the girl looked like an old vintage suitcase, that's what inspired the suitcase. I got into my chipboard and found a huge o, cut it in half, inked it up with Distress Walnut Stain ink, added the giant brads and glued it down. I punched some corners for the bottom with a corner punch. 
While I was in my chipboard stash I found some Tim Holtz grungeboard dots elements and plain seasonal pieces, the lantern and arrow. I painted the lantern with my pitch black paint dabber and added Glossy Accents inside for the glass. I put Distress Faded Jeans ink on the arrow with a blender tool and added Faded Jeans Distress Stickles.
I stamped the Prima doll stamp on cream cardstock and paper pieced her dress and headband with paper from the collage paper pad. I colored her with Copic markers e00, r20 and e57.
I cut a piece of a vintage cloth tape measure and put it on the edge of the page with the tiny attacher. 
I had a couple of pieces of vintage lace on my desk and I used those along the top and side of the page.
I outlined the suitcase and doll with my black Faber-Castell big brush marker and smeared the ink with my finger for definition.
Ok, head on over to the Journal and upload your travel creation, you could be a winner of the wonderous $50 in store goods!
~~~~~~~~~~~~~~~~~~~~~~~~~~~~
Have a great day!
  From Millan.Net 

Related Posts Plugin for WordPress, Blogger...