


This months Crafty Secrets designer challenge is childhood, anything pertaining to childhood.
I've had this wooden cube in my alter crate for years moving it around in my searches, so I decided this was a perfect time to alter it using photo's of 2 of my granddaughters.

I printed the papers from the new Crafty Secrets Patterns CD onto white cardstock and cut the pieces to add to each side of the cube, I left the bottom blank. I distressed the edges of each side with my Brilliance Moonlight White ink pad, and added faux stitching with my tracing wheel. I printed 4 photos of my granddaughters on the antique setting on my photo software and punched out 2 of them with my Marvy scalloped punch and the other 2 I adhered behind Tattered Angels chipboard frames that Sandy is selling now. I painted the frames with Tattered Rose Distress Crackle Paint and sprinkled glitter on the wet paint. The J and the J frame are from the same Tattered Angels chipboard.
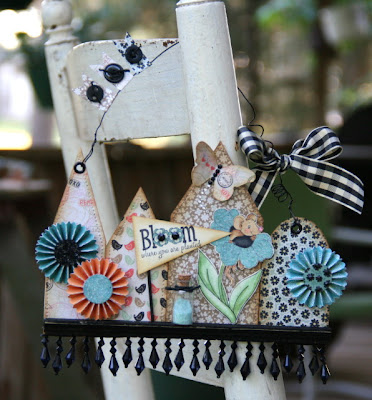
 The sentiment and fairies are from the Childhood Image & Journal Notes booklet, I cut them with a Spellbinders Labels 4 Die. I painted the box feet with my Snow Cap Paint Dabber and adhered them with E6000.
 I cut 2 tim mini rosette's from the Pastel Paper Pad and added buttons to the centers.
 I added buttons here & there and Kaiser Pearls.
 The top is a pink knob I got at Hobby Lobby, it's adhered with E6000.
~~~~~~~~~~~~~~~~~~~
 I distressed the edges of each side with my Brilliance Moonlight White ink pad, and added faux stitching with my tracing wheel. I printed 4 photos of my granddaughters on the antique setting on my photo software and punched out 2 of them with my Marvy scalloped punch and the other 2 I adhered behind Tattered Angels chipboard frames that Sandy is selling now. I painted the frames with Tattered Rose Distress Crackle Paint and sprinkled glitter on the wet paint. The J and the J frame are from the same Tattered Angels chipboard.
 The sentiment and fairies are from the Childhood Image & Journal Notes booklet, I cut them with a Spellbinders Labels 4 Die. I painted the box feet with my Snow Cap Paint Dabber and adhered them with E6000.
 I cut 2 tim mini rosette's from the Pastel Paper Pad and added buttons to the centers.
 I added buttons here & there and Kaiser Pearls.
 The top is a pink knob I got at Hobby Lobby, it's adhered with E6000.
~~~~~~~~~~~~~~~~~~~
Make sure you check out the other designer's blogs for more childhood goodness. You'll get to see the 8 newest designers at work!
Vicki Chrisman DT Leader
Heidi Blankenship
Linda Duke
Julie Campbell
Michele Kovack
Amy Teets
Debbie Marcinkiewicz
Fauve VanMaanen
Gini Cagle
Jan Hennings
Tammy Roberts
Victoria Warren-Mears
Viola Mahr
Heartwarming Vintage Blog
Heidi Blankenship
Linda Duke
Julie Campbell
Michele Kovack
Amy Teets
Debbie Marcinkiewicz
Fauve VanMaanen
Gini Cagle
Jan Hennings
Tammy Roberts
Victoria Warren-Mears
Viola Mahr
Heartwarming Vintage Blog
~~~~~~~~~~~~~~~~~~~
Have a great day!


 I wanted to create a project with Tim's new
 The butterfly is cut with Tim's


 Some Shiny Brite Christmas ornaments, a tiny hot water bottle, I've never seen one this small. I'll use it to keep something or someone small, warm Ü. An old film reel. I'll use pieces of the film on projects. An old hammer to flatten my spoons with. An old spoon. A bag of tiny Disney ornaments I'll use in projects. An empty bottle of Old Spice, I'll probably use for a vase. Some old cookie cutters. Old tatted trim. A small Fenton hobnail milkglass dish.


 Isn't the sentiment pretty? Sandy always finds the best ones to go along with her vintage images!


 He's a very versatile little guy, with the cutest sentiments and this dotted design that will fit inside his shell. He's stamped him on some
 I had to add some


